


An introduction to Line Art
So let’s get started. What is Line Art by definition
“Line art or line drawing is any image that consists of distinct straight or curved lines placed against a (usually plain) background, without gradations in shade (darkness) or hue (color) to represent two-dimensional or three-dimensional objects."
How is line art are different to shading?
Ultimately the aim of line art and shading is to add volume and tone to a drawing by darkening parts of the image, whilst leaving white space in other parts.
Shading is more or less tones of lights and darks that usually a consistent gradation.
Line Art however strictly utilises lines of various structure to give the illusion of lights and darks. The varying lines often have negative space in between which creates the varying tones. The more white space the lighter the overall tone appears, and the less space, the darker the overall tone appears.
Common line art techniques have been used by artists for hundreds of years, and are still used today. Each artist executes them in their own way to create a personalised line art style.
The Different Types of Line Art
Let’s first examine some fundamentals types line structure used to create the lights and darks in a line drawing.
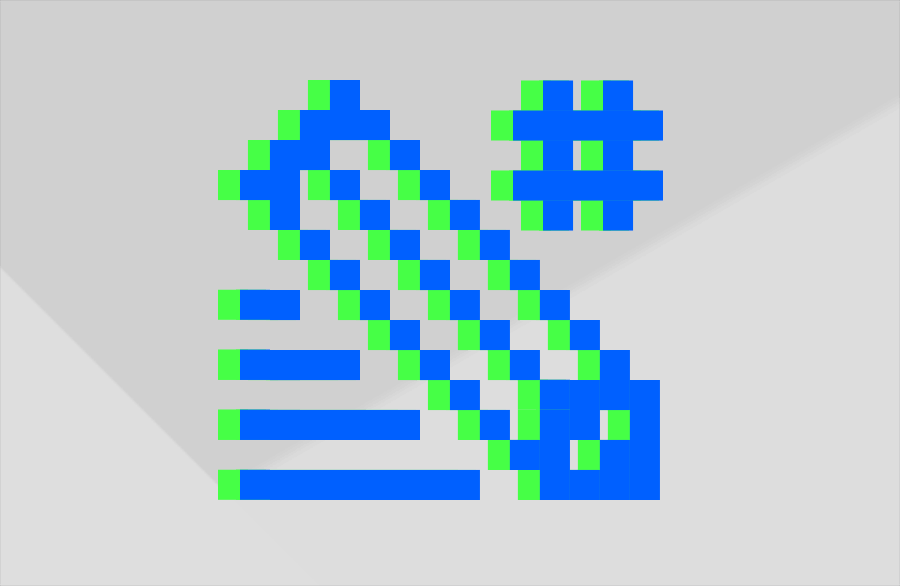
Stippling
Block Shading

Continuous Line
Cross Hatching
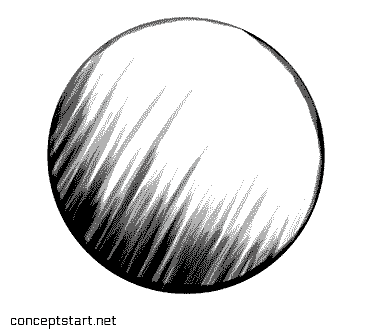
Hatching
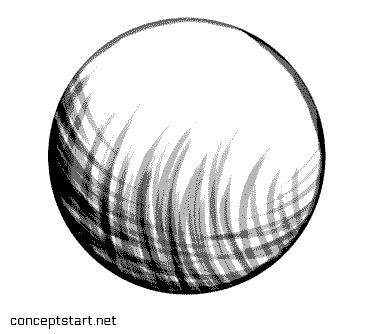
Cross Contour Lines
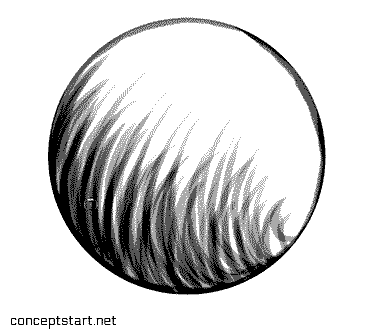
Contour Lines
So these are the main types of line structure that tend to be used in line art drawings. Now Let’s examine some great artists going back a few hundred years through to modern day.
Masters of Line Art & Drawing
Hendrick Goltzius
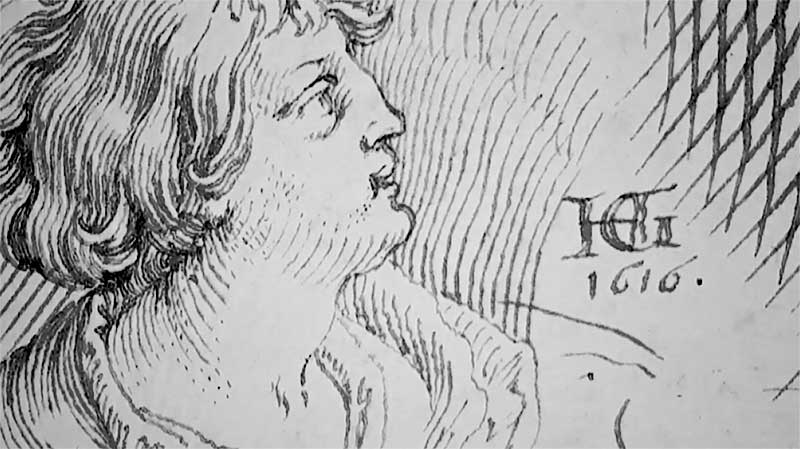
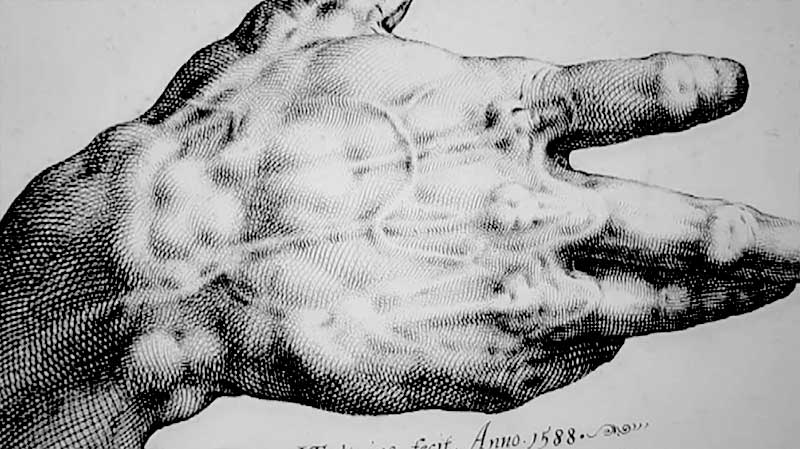
Image of women: Going back to 1600s now, this is classical approach to line art drawings. He’s mostly using contour lines and varying the gaps in between to give the illusion of tone. These contours follow the form to suggest the volumes. For the deepest shadows we have some block shading that occurs, but not much. We can see a pattern on the right for cross contours
Image of hand: Moving on we have a classically drawn hand using mostly cross contour lines, with some singular contour lines and stippling dots to fill in shadow areas. You can see how the lines vary from straight to curved lines to suggest the form changes. These lines overlap mostly in areas of shadow, and appear more faint in the parts that catch the light most. These lines all work together to suggest the overall 3D form.
Jacques de Gheyn II
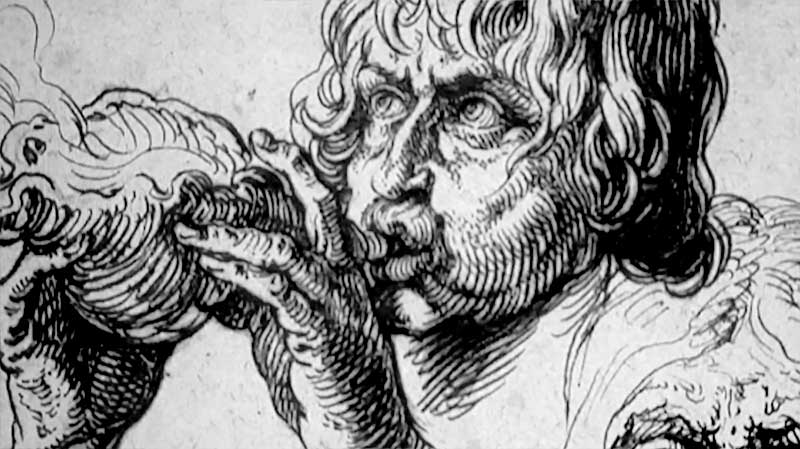
Image of faces: This next image by Jacques de Gheyn II demonstrates some great use of how to mix Single and Cross contour lines. Again, we see in the deepest shadows he has used some block shading which helps to suggest the form around it. The contour lines wrap around the form in a way to not make it appear flat.
Gustav Klimt
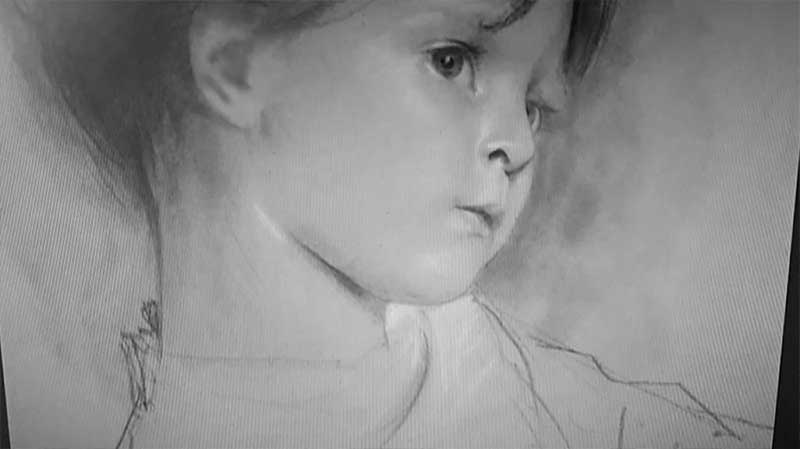
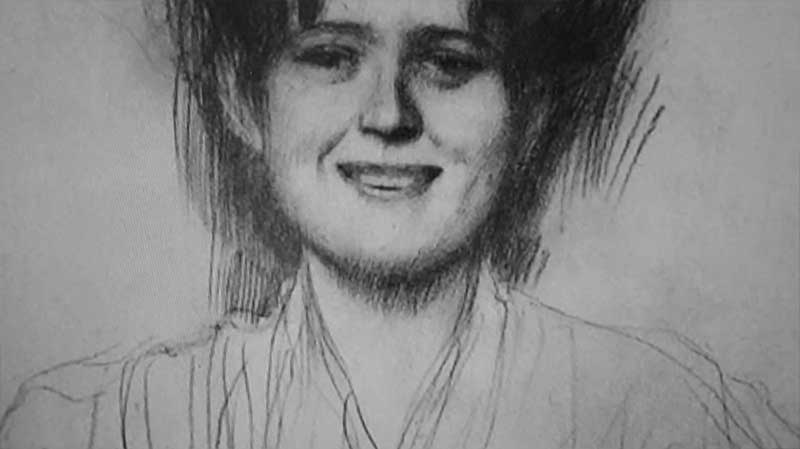
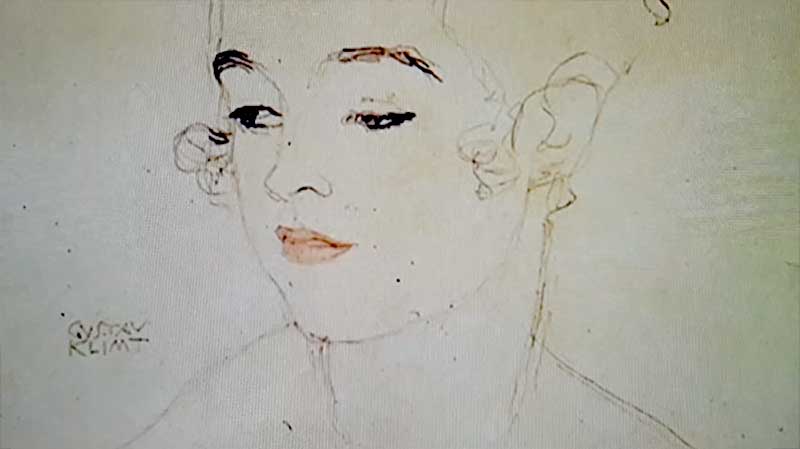
Image of Girl: Here we have a totally different type of drawing by Gustav Klimt. You can see how he has started out with basic lines to get the overall shape of the form. He then continued with lots of strokes of basic lines to shade in dark areas with tone, some white has bring out the highlights. This drawing shows how basic lines develop to become a mixture of seamless lights and darks.
Image of Woman 1: The drawing of this woman using basic line technique to achieve the results of a female face with volume. If you look closely the lines haven't been blended in fully and seem to have a common direction angled slightly to the right. More lines and pressure have been applied in the darkest areas.
Image of Woman 2: This next image is from the same artist but takes a completely different approach. Single gestural lines are used to sum up the overall look and feel of the woman. There’s no shading yet it still looks complete.
Andrew Loomis
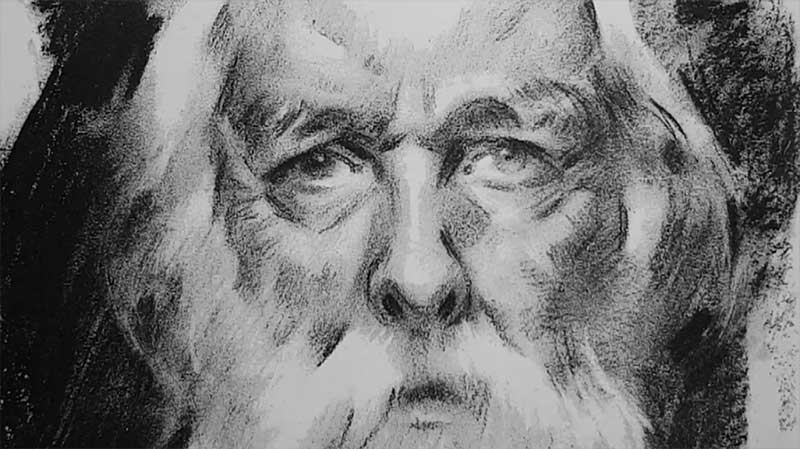

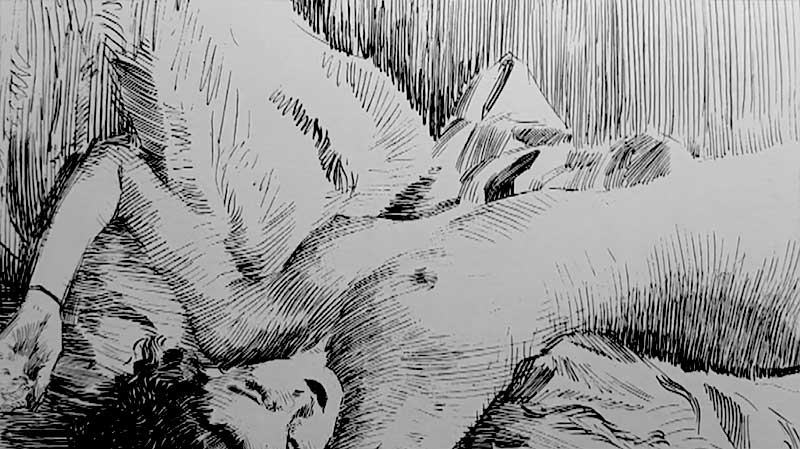
Image of Man: Now moving into the 21st Century…Andrew Loomis showcases some fine shading techniques which looks like charcoal. This line type by default creates tone, we can vaguely see the directions of his strokes which creates the varying lights and darks.
Image of Woman: Andrew loomis mastered many line styles, and this one demonstrates how mostly straight lines can be used to convey the form of a subject and still make it appear to have volume simply by changing the angle of the line. The lines follow the flow of the form. He uses a mixture of hatching and cross hatching with some block shapes. He also demonstrates how you don’t even need lines to suggest edges. A collection of linesend and where the white space start suggest the top of her leg.
Frank Frazetta
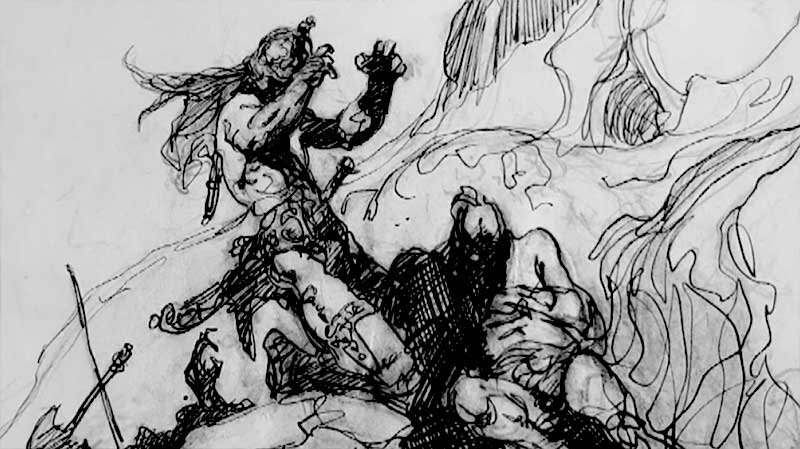
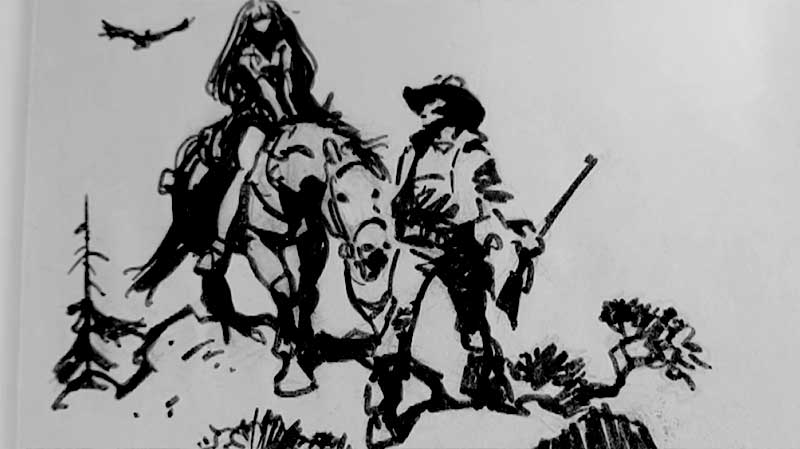
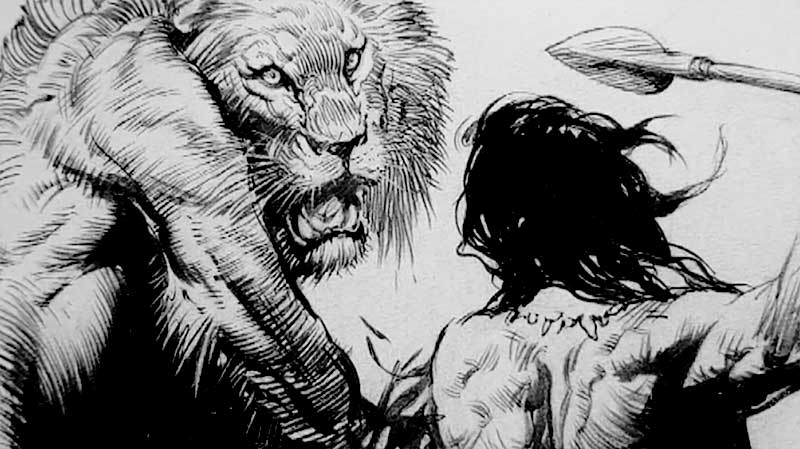
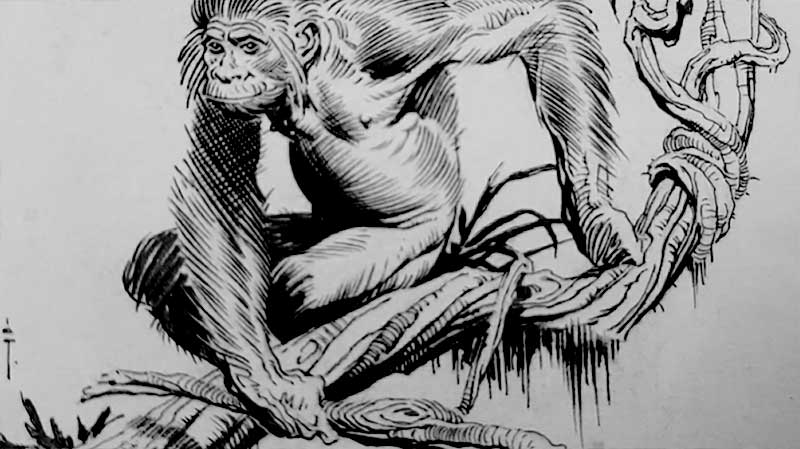
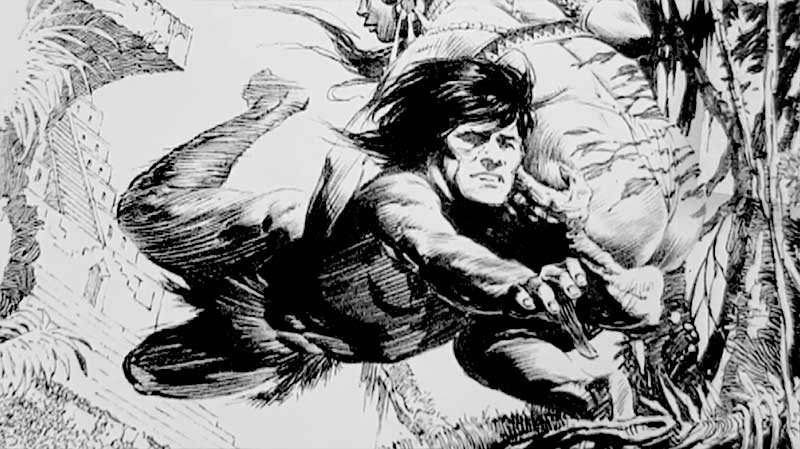
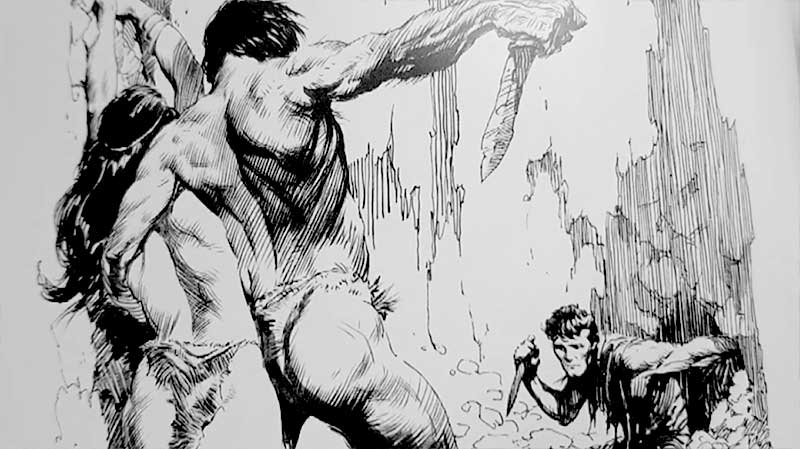
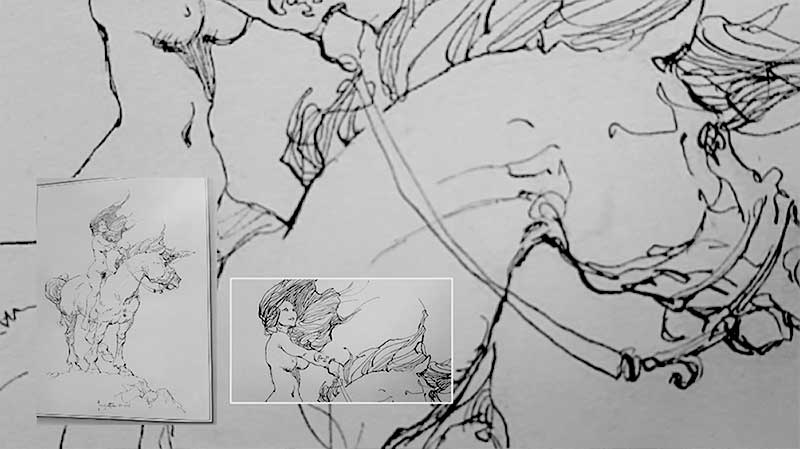
Image of Sketch 1: And now, a legend amongst concept artist. Frank Frazetta. This first drawing is just a sketch but carries with it abundant movement through what looks like gestural and continuous lines, hatching and cross hatching. These provisional sketches were made to study how the lights and darks of a piece will read before painting it.
Image of Sketch 2: In another sketch he uses block shading in ink, it does the same job of understand the initial read of an art piece. If it works in black and white, it will work when fully rendered. This principle is still used today by artists across the world.
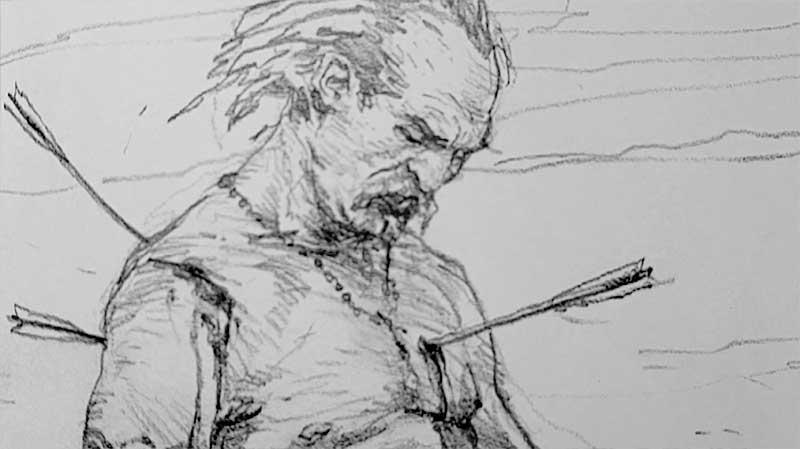
Lion Drawing 1: Now moving onto a more polished line art drawing. Here he has used mostly contour line techniques in different directions that follow the form. He uses some cross contours lines and block shading in parts, this is common within his work to help shift the focus and balance the overall drawing.
Lion Drawing 2: There are a lot of block shadows in this next drawing which suggest the darkest parts. Contour lines extend from them to convey a shift in tone, like a gradient from dark to light. These lines follow the form. The direction of the lines are also intentionally used to guide the eye throughout the drawing. We see the shape of the man's foot as a fusion of block shadow and hatched diagonal lines for a sense of movement.
Monkey Drawing: This monkey is almost exclusively drawn using contour lines, there are barely ANY basic outlines drawn. There’s some block shaded parts, and a variety of lines between the monkey and the branch to add some really nice visual interest.
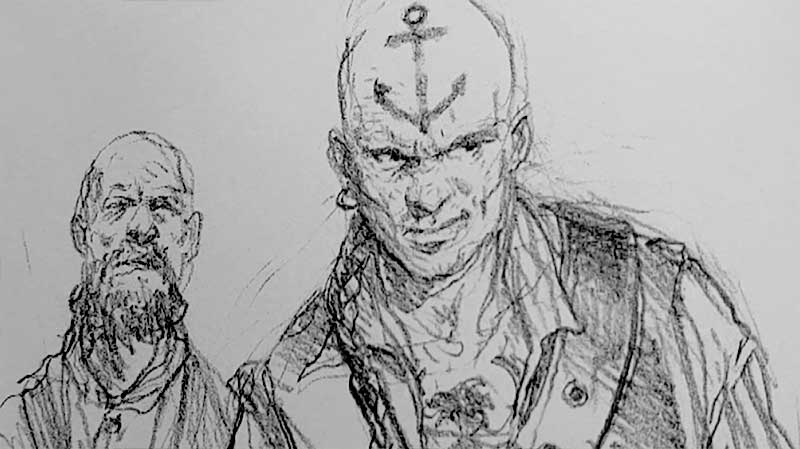
Image of Tarzan 1: This tarzan like drawing shows the majority of this body in shadow. Because he’s moving the lines don’t fully wrap around each part of the body, instead they form a block shape and whisk in the direction of movement from his chest through to his back leg which is merely suggested as lines clump together to describe some necessary muscles parts. The type of lines vary across the foliage to capture different plants, they appear very still and contrast figure to give it even more movement.
Image of Tarzan 2: This next tarzan piece starts with a basic sketch. There’s a mixture of lines going on here; block shading for the deepest shadows and some contour lines which could almost be mistake for hatching lines, except they curve slightly. The vertical lines in the background help to frame the main scene. Vertical lines are renowned for suggesting tall height.
Cowgirl: This next drawing has a lot of energy as continuous lines appear to clump together in part to form the shadows. You should note that shadows alone can suggest the form.
Finals And finally here’s a couple of drawings that show his process. He clearly starts out in pencil to get the overall light and dark values, and then adds in the stylized block shading and contour lines over the top. These contour lines suggest midtones that transition into light. The direction of these lines are fundamental to how to drawing flows.
Karl Kopinski
Moving onto what I would call a modern day master, Karl Kopinski. He works mostly in pencil and his lines have a continuous feel, so his drawings always seem to have a sense of energy and movement to them. He has a deep understanding of anatomy and form, which enables him to draw continuously without stopping, this adds to the energy of the piece. He tends to start with basic continuous lines,and then builds up the volumes by hatching lines in to create the shadows and midtones. Like the others, his lines follow the form but don’t seem to cross over all too often. They tend to be mostly drawn straight but at different angles.
His backgrounds tend to be very simple, using just enough to suggest something, which also works well because it gets the viewers imagination involved. This also compliments the main figure in the foreground by giving it context. Some block shading occurs depending on the piece, but he mostly uses hatching lines in varying directions to suggest the shadows and midtones, which ultimately suggest the form.
Kim Jung Ji
And finally, Kim Jung Ji is a master of his craft and demonstrates a broad range of techniques in pencil but mostly uses ink pens. He uses a lot of block shading techniques to give his drawings depth and realism, and tends to draw a mixture of hatched lines and contour lines that follow the form.
For some of his block shading techniques he simply just draws straight lines across the overall shape, or area to suggest shadow. The higher frequency of lines create a darker overall tone, so for a mid tone shadow you can expect to see bigger gaps in between the lines.
The bulk of his work in ink, showcasing block shading with some mid tones used by smudging. The visual library is so extensive in his mind, he can just recall it to memory and we see the drawing come out effortlessly. He also utilises a sense of warped perspective which also adds to his sense of depth and realism.
What do the Line Art Masters have in common?
These artist are extremely effective with drawing lines, it seems effortless. But what do they all seem to have in common?
They have firm understanding of anatomy.
This enables them to have an accurate sense of volume and proportion which makes the drawing believable, and more engaging.
The lines follow & wrap around the form
The line art doesn't appear flat since the lines follow the contours of the subject. They assume the 3D nature of the subject as captured in 2D.
Vibrant energy from the lines
There is a certain confidence to the way that their lines flow. There's a lot of energy which is captured from the movement of their hand. Not all artists incorporate this movement, but it is common and adds appeal to the drawing.
The lines are efficient and have their place
The lines are intentional and communicate something about the subject. Ultimately, any lines that aren't necessarry shouldn't be there. Each line works to communicate as part of the overall drawing.
Varying line weights used correctly
The thickness of line helps for many reasons. They help to add focus in certain areas, they're used to describe different materials and also differentiate the dark and light areas. One thing to not is that if the light is directly above an object, then the thicker lines would appear underneath the forms and not in areas that the light directly hits.
Lines follow the form & light
Lines can follow the form but they can also follow the light as it wrapes around the form. This can really help the drawing to flow.
Suggest form with subtle lines
Sometimes, the artist merely uses subtle lines and basic shapes to suggest the form of something, missing out all the details in between. This helps to gain control of what is most important to the drawing, and it also helps to engage the viewers imagination by getting them to fill in the details.
Correct Value Relationships With shading
The relationships between the lights and darks of the image are accurate to life. So if there is an occlusion shadow for example, which would be one of the darkest parts of the image, then a similar tone is applied to what should be a mid-tone, then this will throw the whole image out as the lighting is no longer consistant.
Now, most of use will be a long way from being able to draw this effectively, but if we can begin to approach drawing within these things in mind it should fast track us to being able to draw with flair and style.
The Art Tasks generator for this video will help you to practice various types of line structure when drawing. It’s designed to help artists explore types of line art, existing artists and developing your own unique style of line art.
Practice and improve your Line art drawings
Line Art Practice Generator
Here’s a practice task generator, prompting me to draw a cap by utilising Black and White shading fused with the Stippling technique.
I started out with a basic foundation line to get the proportions correct and then established my main lines. I used some block shadows for underneath the cap which instantly gave it some depth, and then used stippling to help create mid tones for added depth.
Line Art Leech


Now I’m warm I wanted to leech the brains of some Artists!
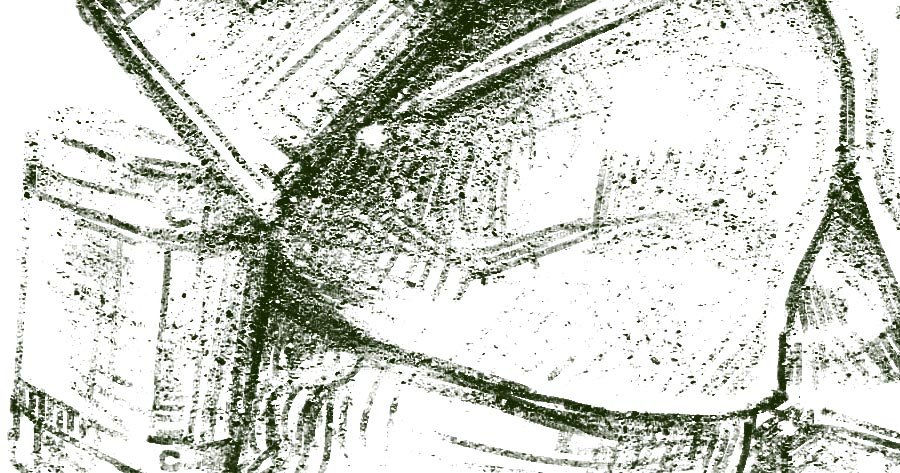
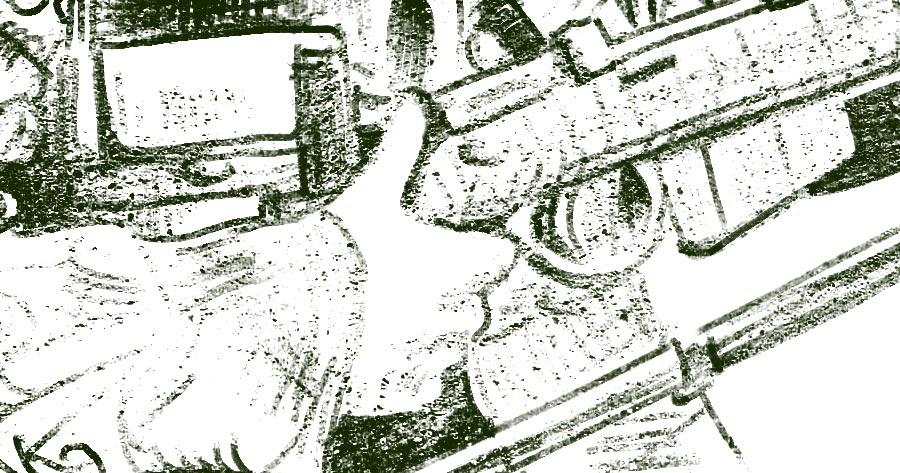
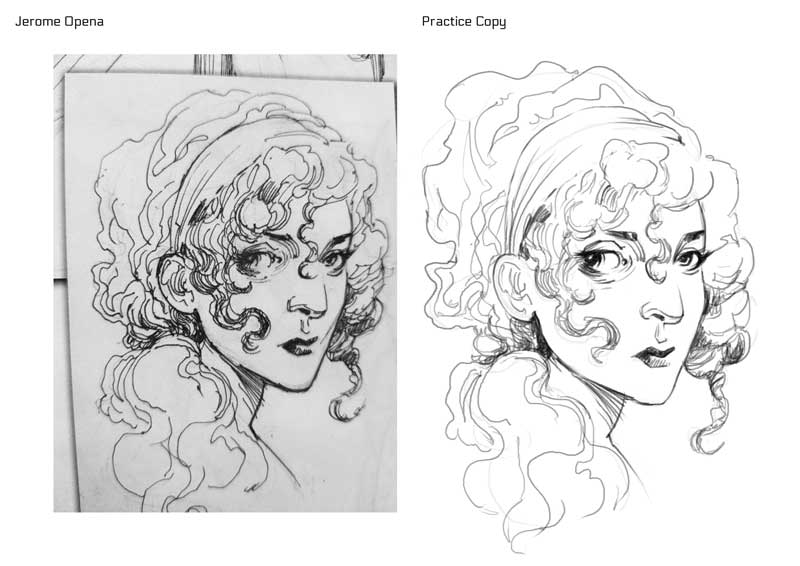
I generated a task to better understand Jerome Opena’s line art style. The first thing was to practice his line art style to understand how he draws andthe way his lines flow.
I was tasked to draw a male face in his style. He’s a popular comic book artists and utilises a lot of block shading techniques for striking black and white drawings. He also has a distinct use of contour lines.
So I start out simply copying his style from a basic line drawing. His lines have a lot of freedom to them, and they don’t really hatch over each other. You can see around the eyes he uses parallel contour lines to suggest shadow areas. It’s so simply yet so effective. It flows.
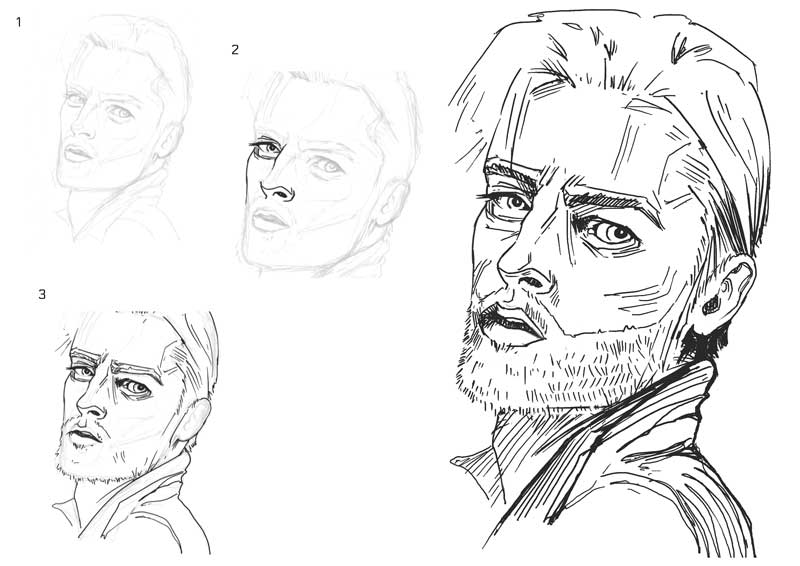
For the final task I start out with some lightly drawn guidelines ready to draw the stylized lines over the top. I try my best to draw based on what I remembered from copying, occasionally using reference from some of his other drawing.
From this exercise I realised that, my drawing was never going to look like a Jerome Opena drawing with just 1 go, if at all. His style is expressed through how he naturally draws.
Line Art Styler
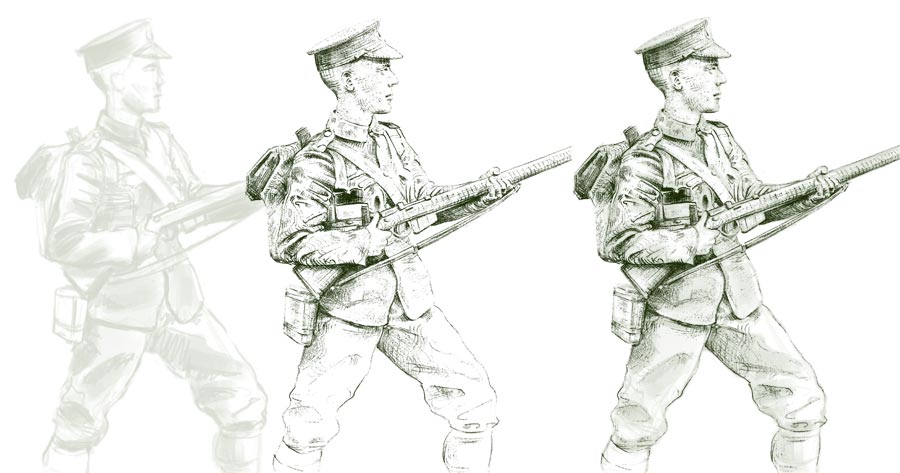
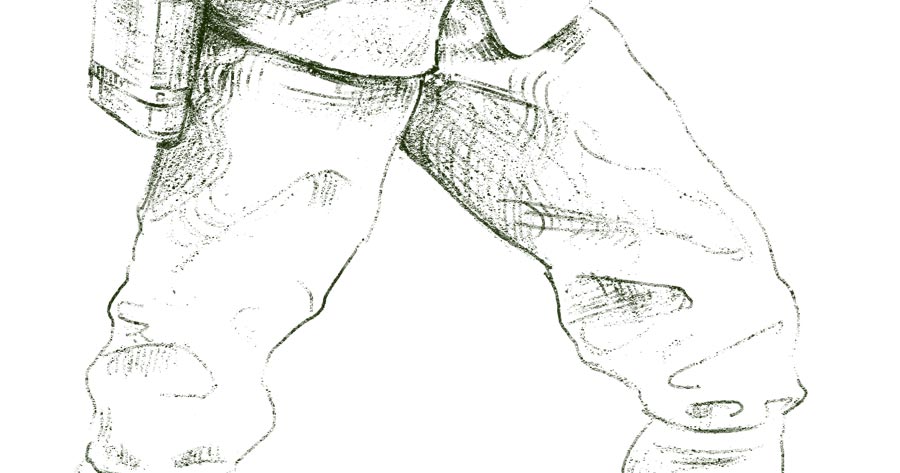
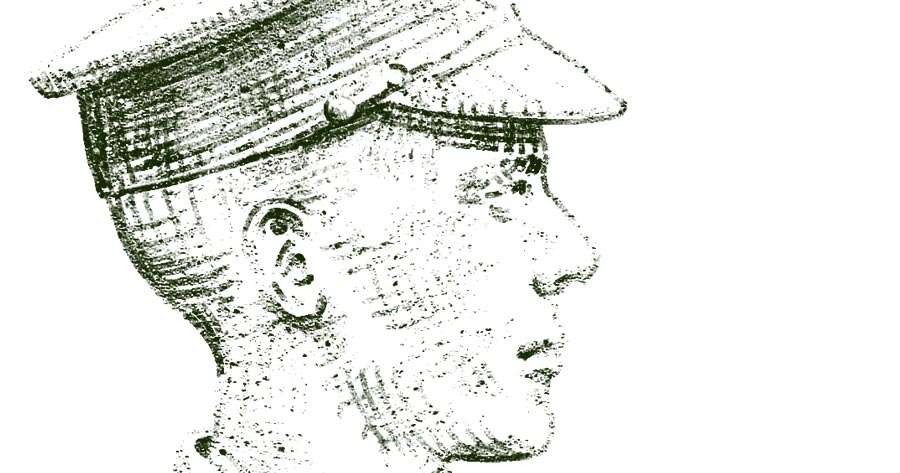
This Line Art Style Generator will help you to explore your own art style through experimentation. There will be a whole video exploring a specific line art style, but for now you can see a drawing based on of the Line Art Styler tasks. I was tasked to draw a soldier with a textured brush using cross contour lines and an ink wash. It took about 2 hours in total, after a few practice experiments on a pyramid shape. This rough and textured line art style really worked with the subject matter of a soldier from world war 2.
Conclusion
So when practicing other artists styles, studying their approach and consider what you can learn or infuse into your own drawings to aid your own style. It’s not fair to the artist or to yourself to simply just rip their style off, but be sure to learn and be inspired by them!
The more you practice drawing, learning from others, experimenting and being inspired, the quicker you’ll develop a niche style of your own!
Consider using the Line Art Styler; it suggest multiple techniques and effects that you could use to develop your own style, so start experimenting now!
Another thing to note, if you want to be a character artist, don’t spend your time drawing trees… maximise your time trying to get really competent at drawing figures. Develop a style around what you want to get paid to draw!
Next Steps to Improvement...
Practice and experiment with different types of Line Structure!
This article covers the fundamentals of line art drawings and how all the masters apply their lines. To improve the most importand thing is to practice and experiment, but we can improve faster by looking closely at how masterful draw and study why their line art is so effective. Be sure to watch the Art Tutorial Video which talks about drawing and line art in more detail, and take advantage of the Line Art Task generators that are designed to help you improve your line art drawings and develop unique styles.
When approaching line art drawings you should be mindful of:
- Each line should have a function & purpose
- Don’t draw lines that don’t need to be there!
- Try to avoid short fuzzy lines, use intentional confident lines
- Observation is key when copying from reference
- Draw your construction lines lightly
| DRAWING TASKS |
![]() Video Tutorials
Video Tutorials ![]() Task Generators
Task Generators
| GET CRASH COURSE |
